


[HOW TO FLASH] how to flash Golden Interstar XPEED LX CLASS C
To flash the Golden Interstar XPEED LX CLASS C, you will follow the same Broadcom procedure as the S2 model. This version is designed for cable (DVB-C) or terrestrial (DVB-T2) signals, but the bootloader uses the exact same folder structure as the rest of the LX Class series.
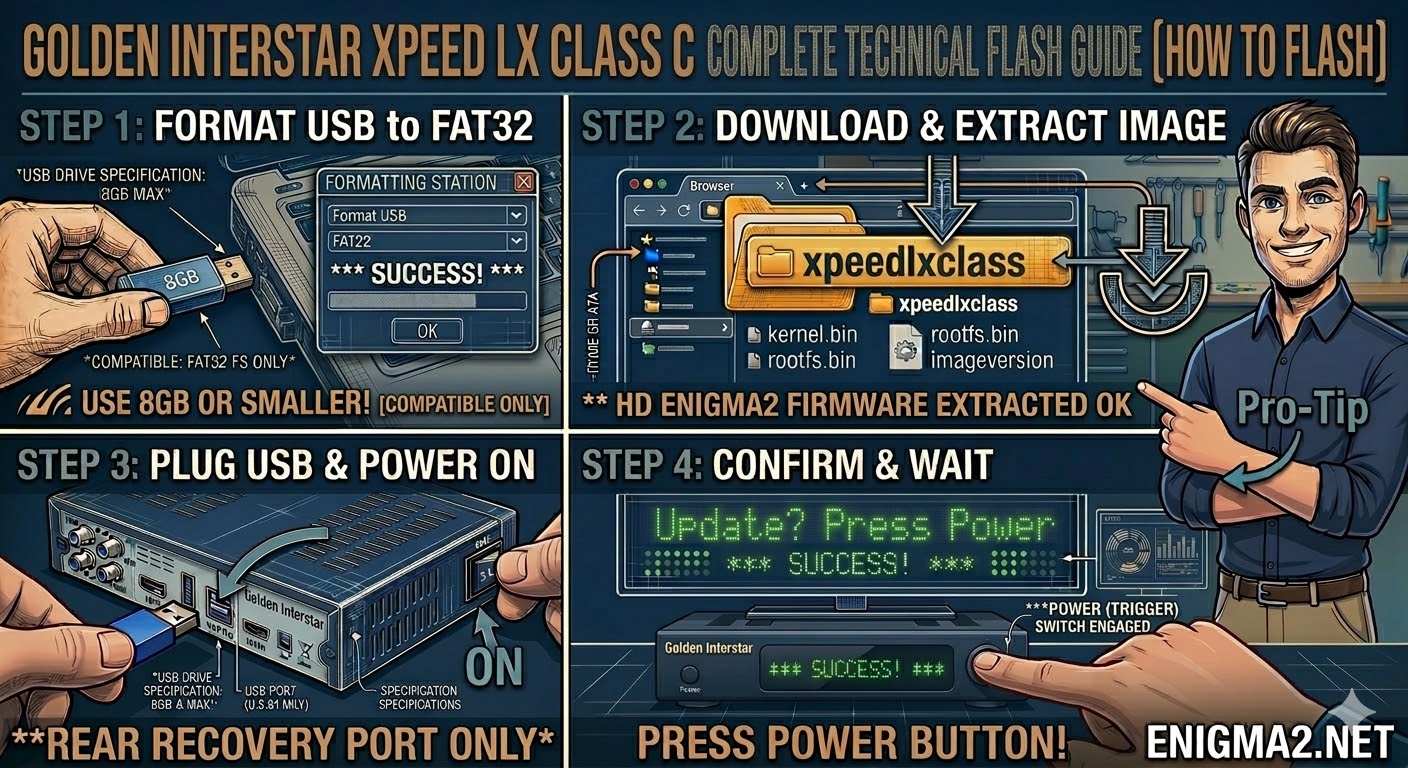
1. Preparation
- USB Stick: Use a USB 2.0 stick (up to 8GB is highly recommended).
- Format: The stick must be formatted to FAT32.
- Firmware: Download the image specifically for the LX Class C.
2. Folder Structure
The bootloader identifies the update via the xpeedlxclass directory.
- Extract the downloaded firmware .zip file on your computer.
- You should see a folder named xpeedlxclass.
- Copy the entire xpeedlxclass folder to the root of your USB stick.
- Path: USB:\xpeedlxclass\
- Contents: Inside the folder, you should see kernel.bin, rootfs.bin, and imageversion.
3. The Flashing Process
- Power Off: Turn off the receiver using the power switch at the back (or unplug the power cable).
- Insert USB: Plug the USB stick into the rear USB port.
- Power On: Turn the power back ON.
- Initiate Flash:
- Watch the front panel LED or the TV screen.
- When the receiver detects the update, it will prompt you (usually USB or Update).
- Quickly press the Power button on the front panel to confirm.
- Wait: The LED will indicate that flashing is in progress. Do not interrupt the power.
- Completion: The receiver will reboot automatically into the new image.


 Reply With Quote